> For the complete documentation index, see [llms.txt](https://docs.overse.app/hubble/llms.txt). Markdown versions of documentation pages are available by appending `.md` to page URLs; this page is available as [Markdown](https://docs.overse.app/hubble/conditions/assign-a-condition-to-content.md).
# Assign a condition to content
Once you’ve created a condition, you can assign it to any content to control when and to whom that content appears.
{% stepper %}
{% step %}
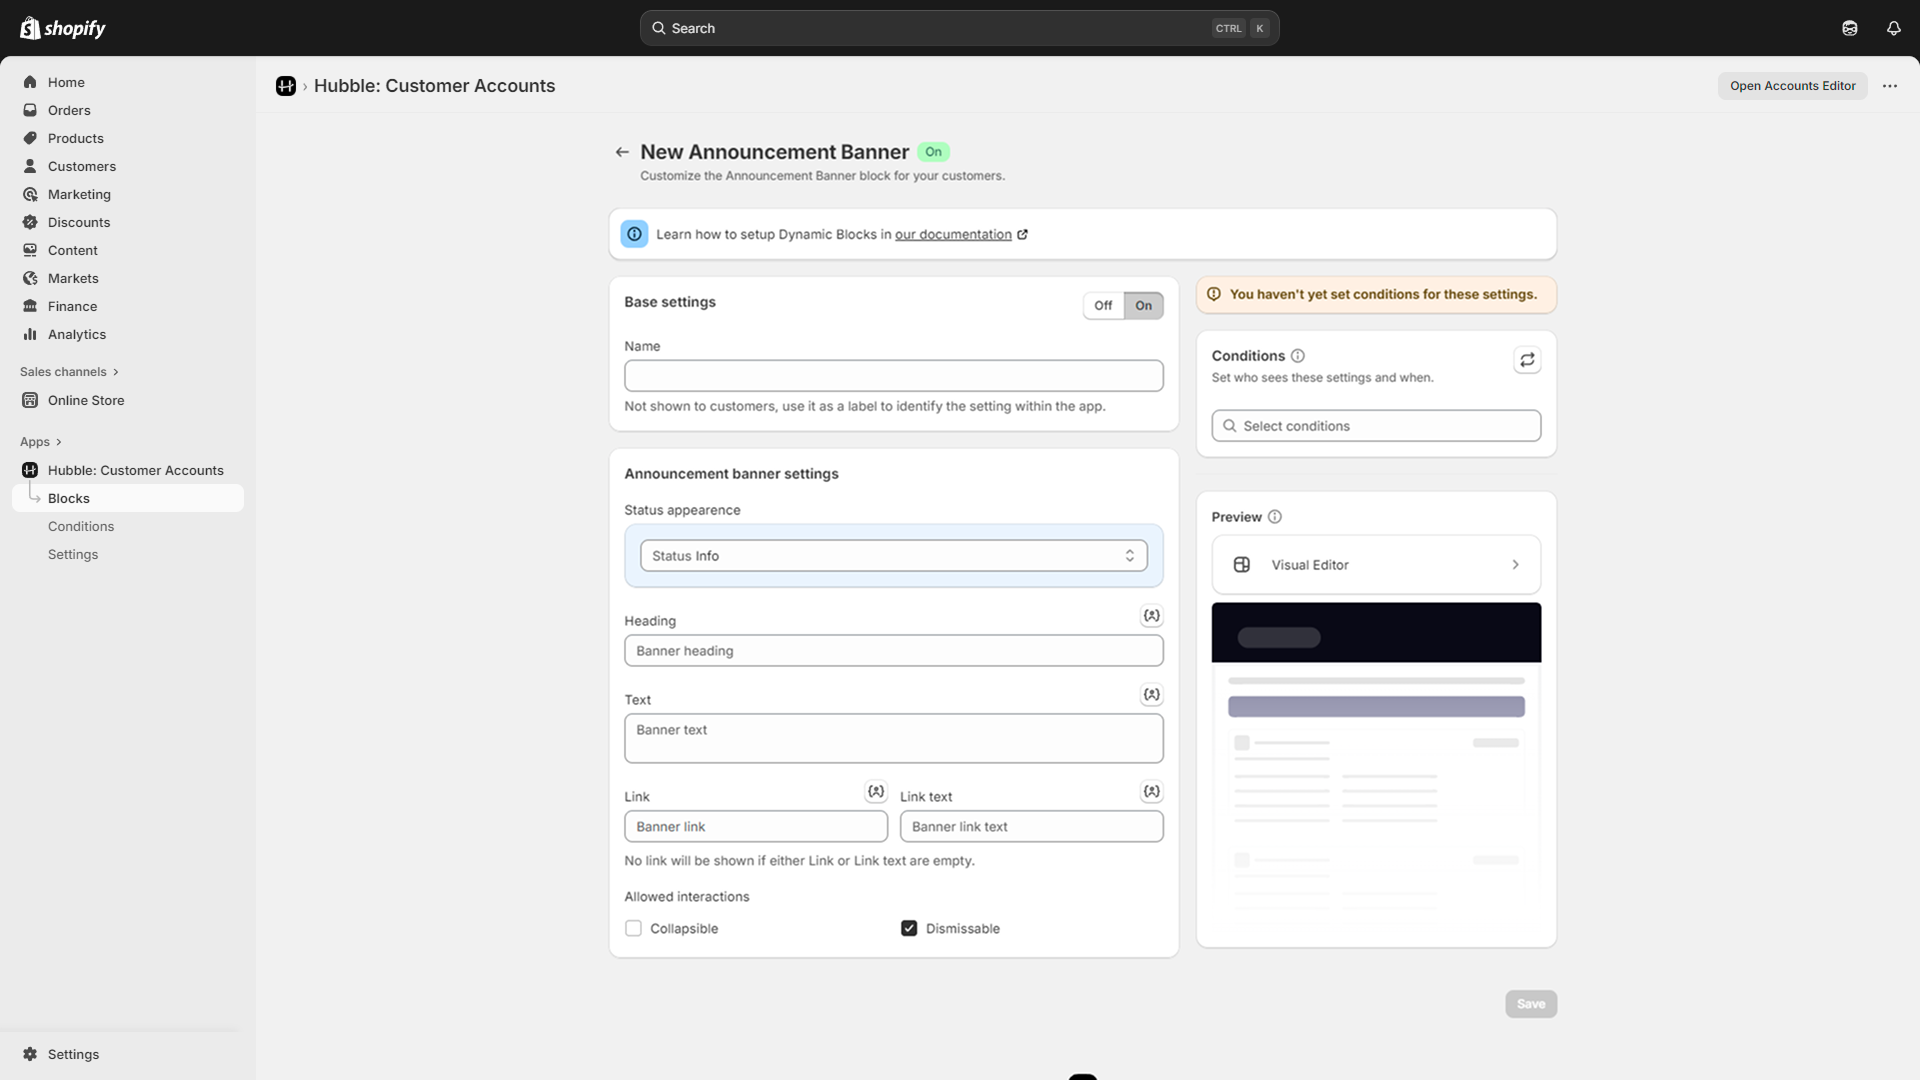
**Navigate to the content you want to assign**
Go to the content you want to control visibility for.\
You can assign a condition to either of these contents:
* Dynamic block -> Setting with conditions.
* Line item action -> Action with conditions.
In this example, we will use the Dynamic block we [created in this guide](/hubble/blocks/dynamic-blocks.md).
{% endstep %}
{% step %}
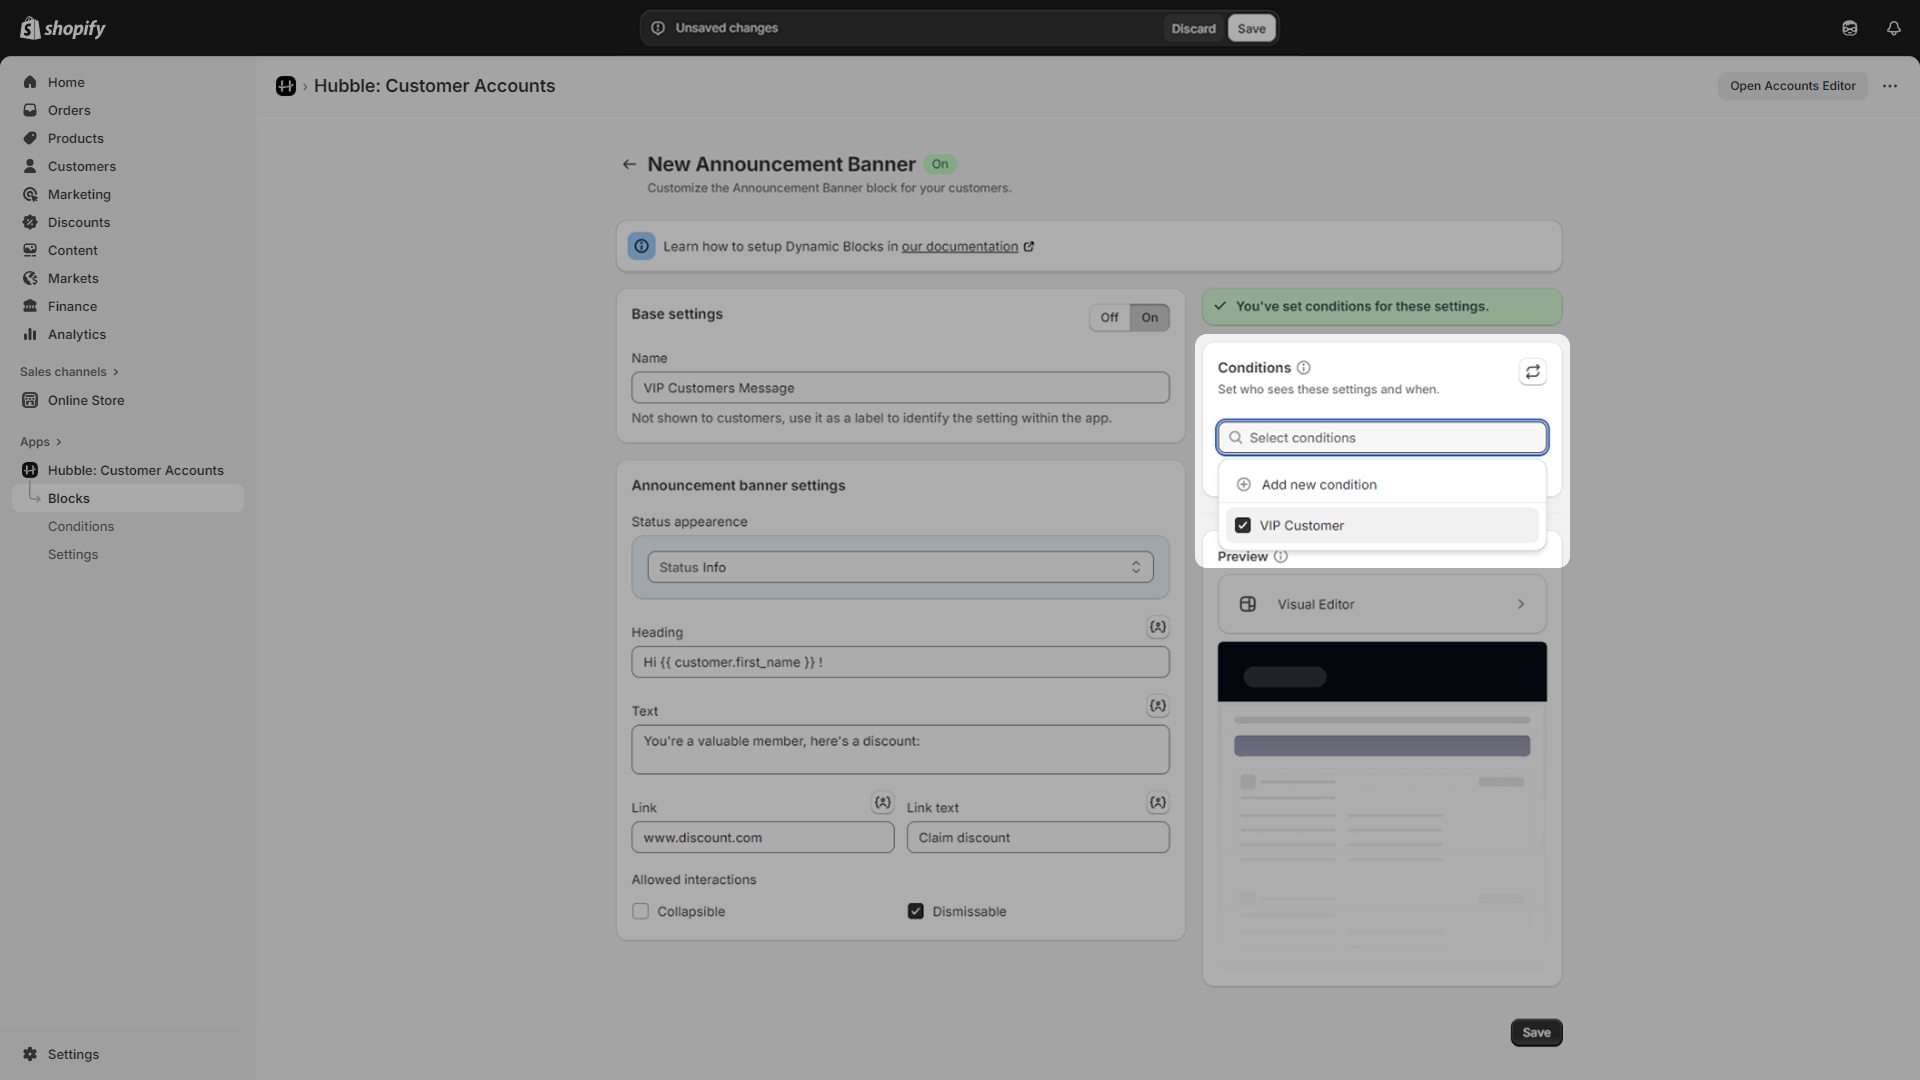
**Locate the Condition section and Assign a condition**
In the block editor, find the **Conditions** section.\
This is where you can link your content to a previously created condition or create a new one directly.
You have two options:
* **Select an existing condition** – Use the dropdown to pick a condition you’ve already created.
* **Create a new condition** – Click **Add new condition** to define one in a new tab.
{% hint style="info" %}
Assigning the same condition to multiple blocks helps you keep content visibility consistent across your store.
{% endhint %}
{% endstep %}
{% step %}
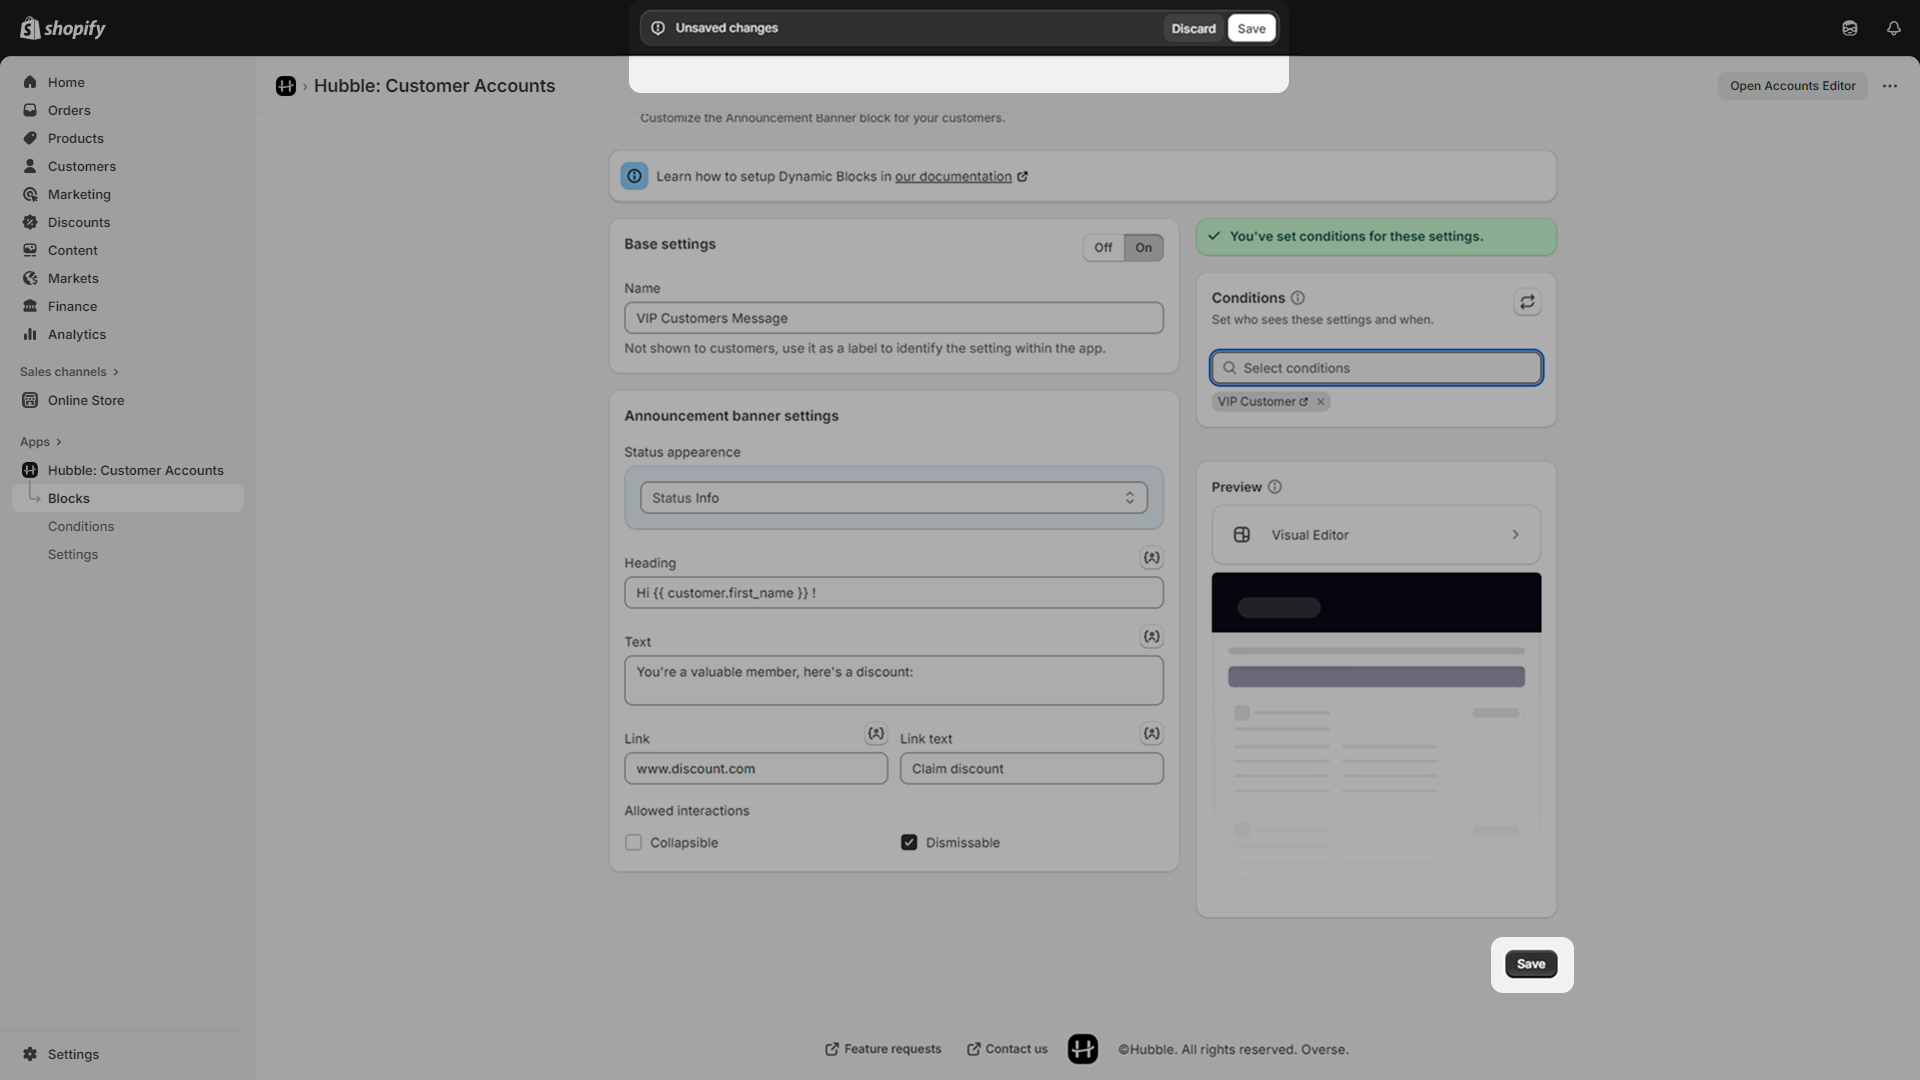
**Save and Preview**
After assigning the condition, click **Save** to apply it.
{% hint style="info" %}
You can then use Shopify’s Accounts Editor to preview how your content behaves for different audiences or scenarios based on your assigned conditions.
{% endhint %}
{% endstep %}
{% endstepper %}